Overview

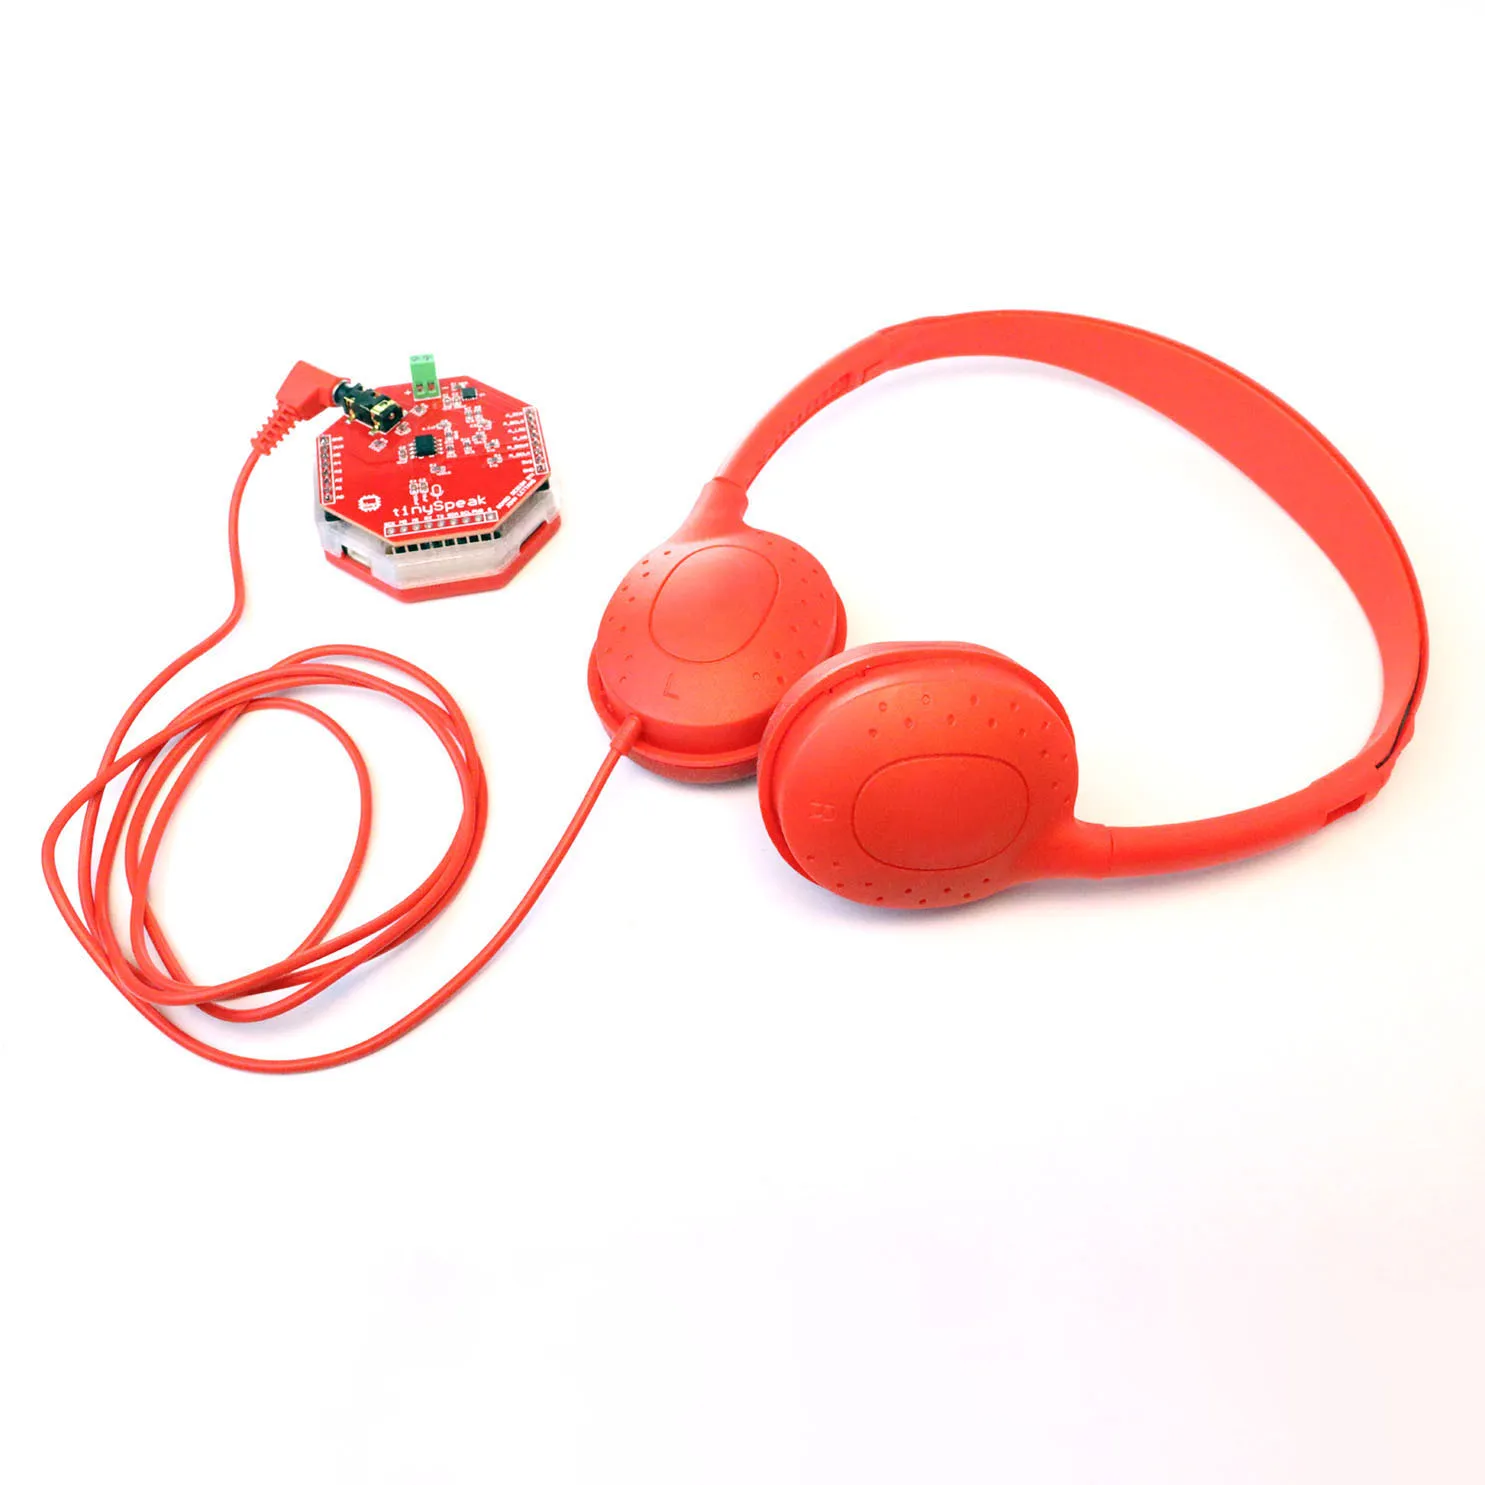
tinySpeak is an audio expansion HAT that stacks directly on top of the tinyCore ESP32-S3 and turns it into a complete audio development platform. It provides everything you need to build projects that listen, speak, and play music — with no external wiring required.
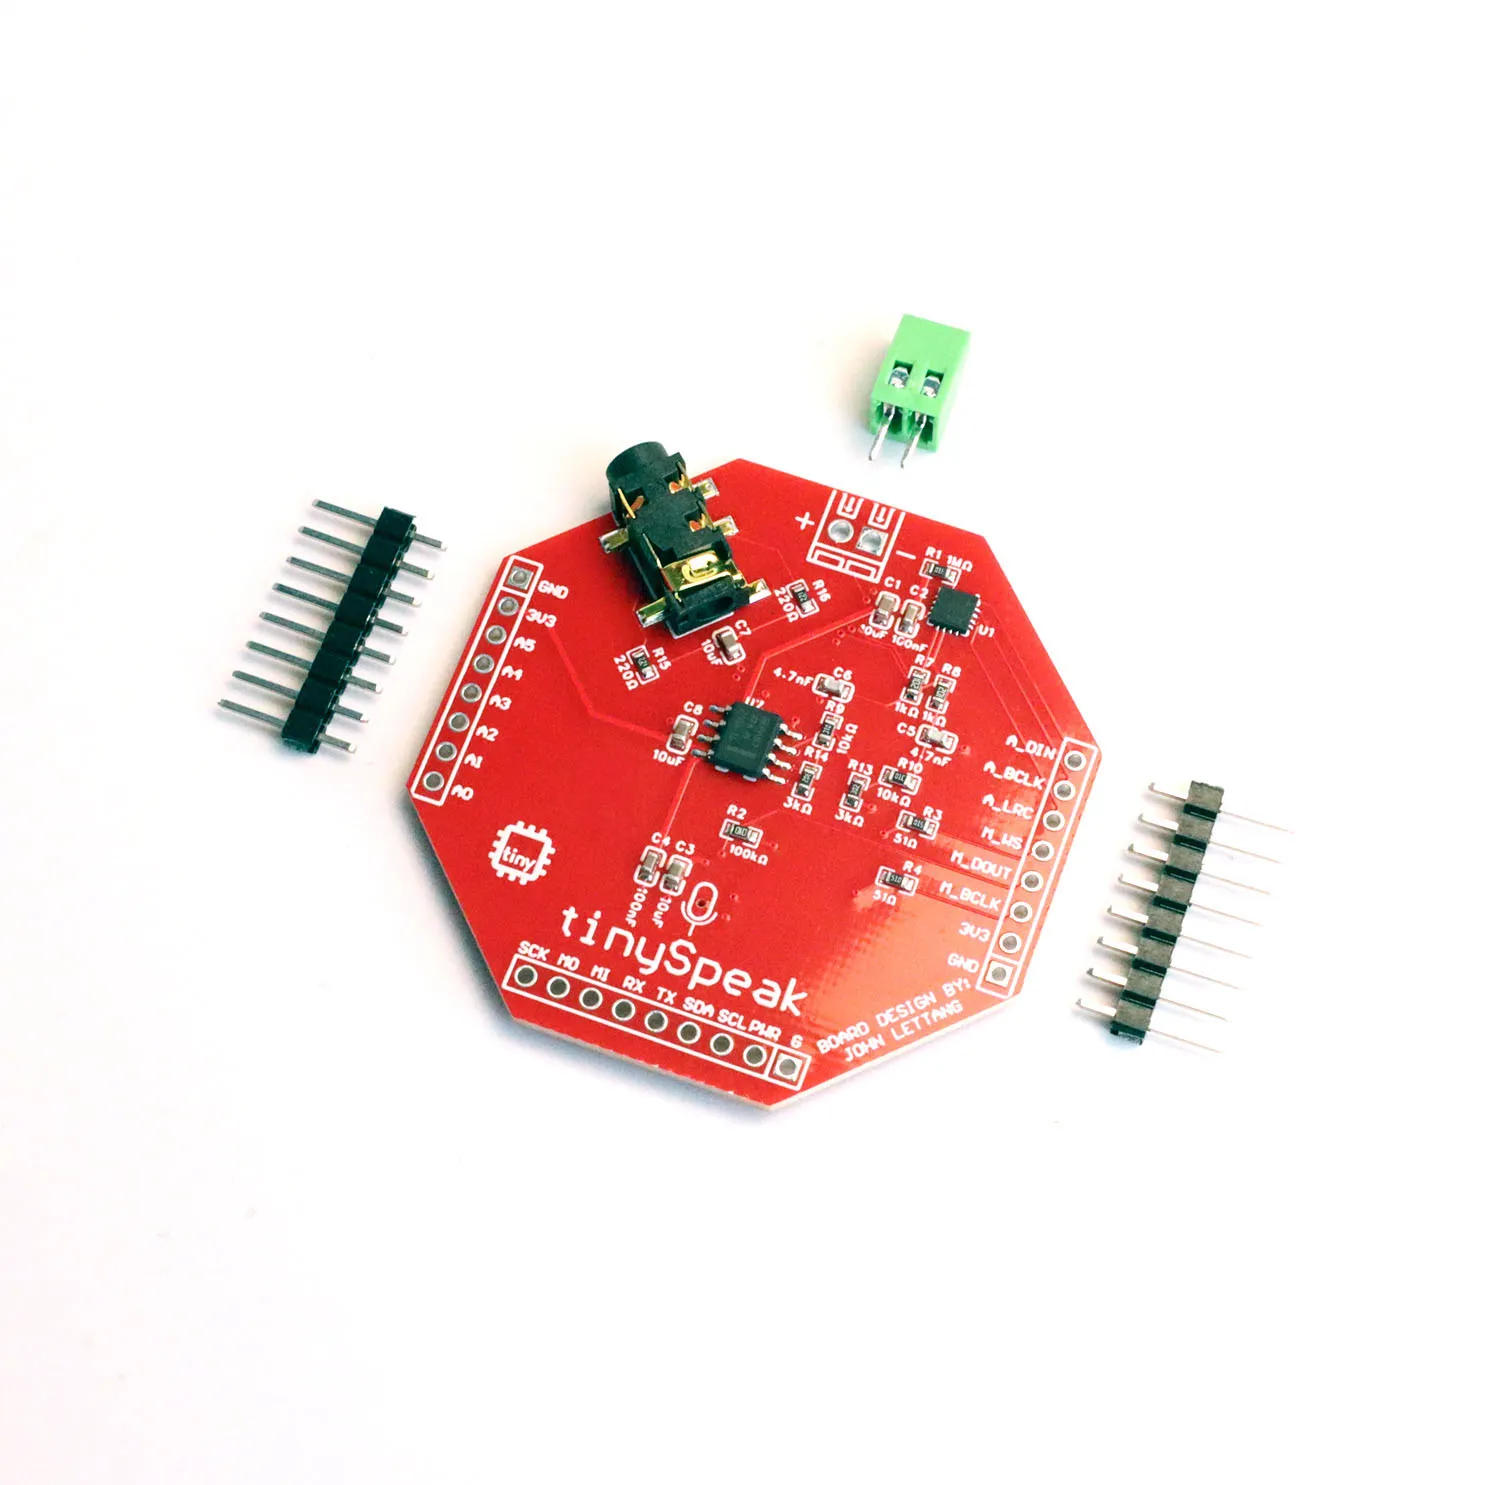
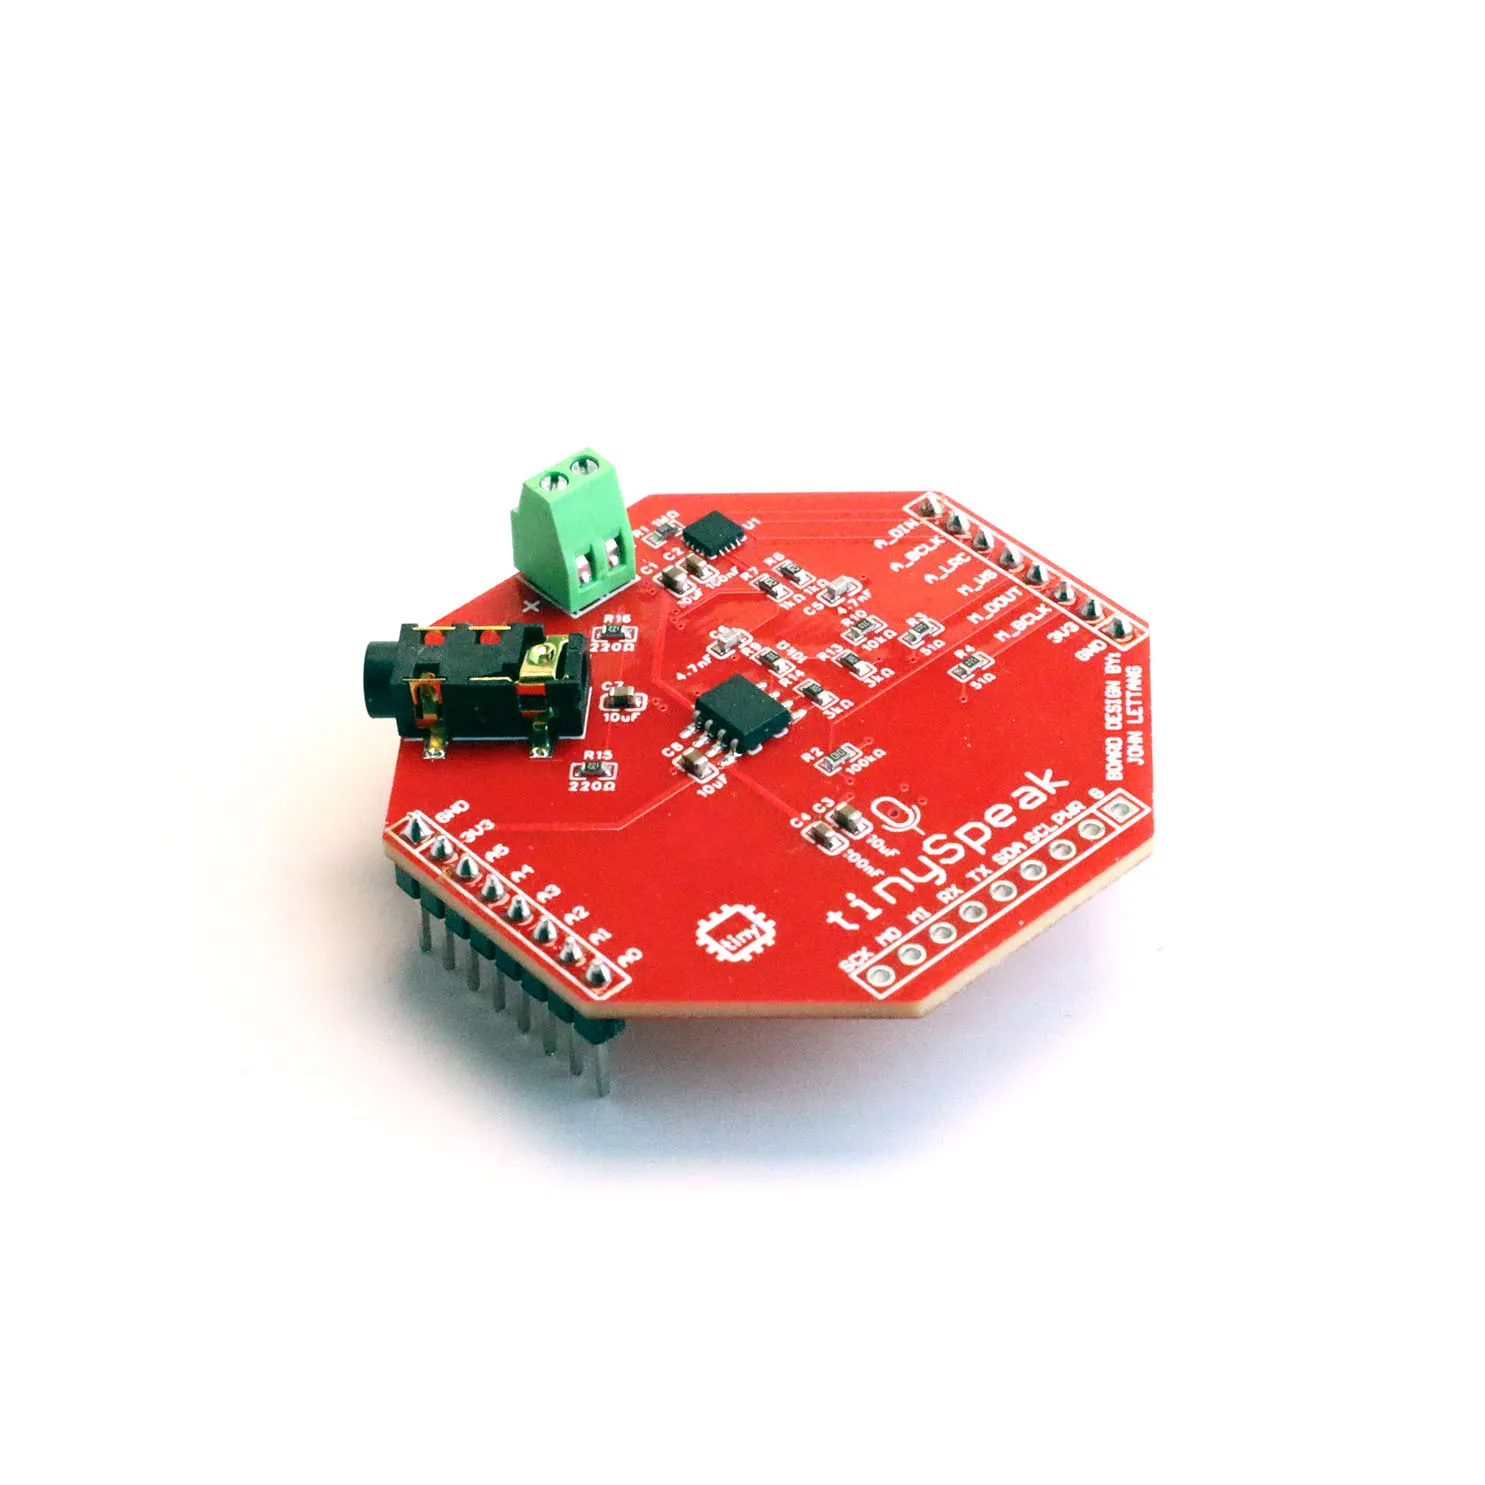
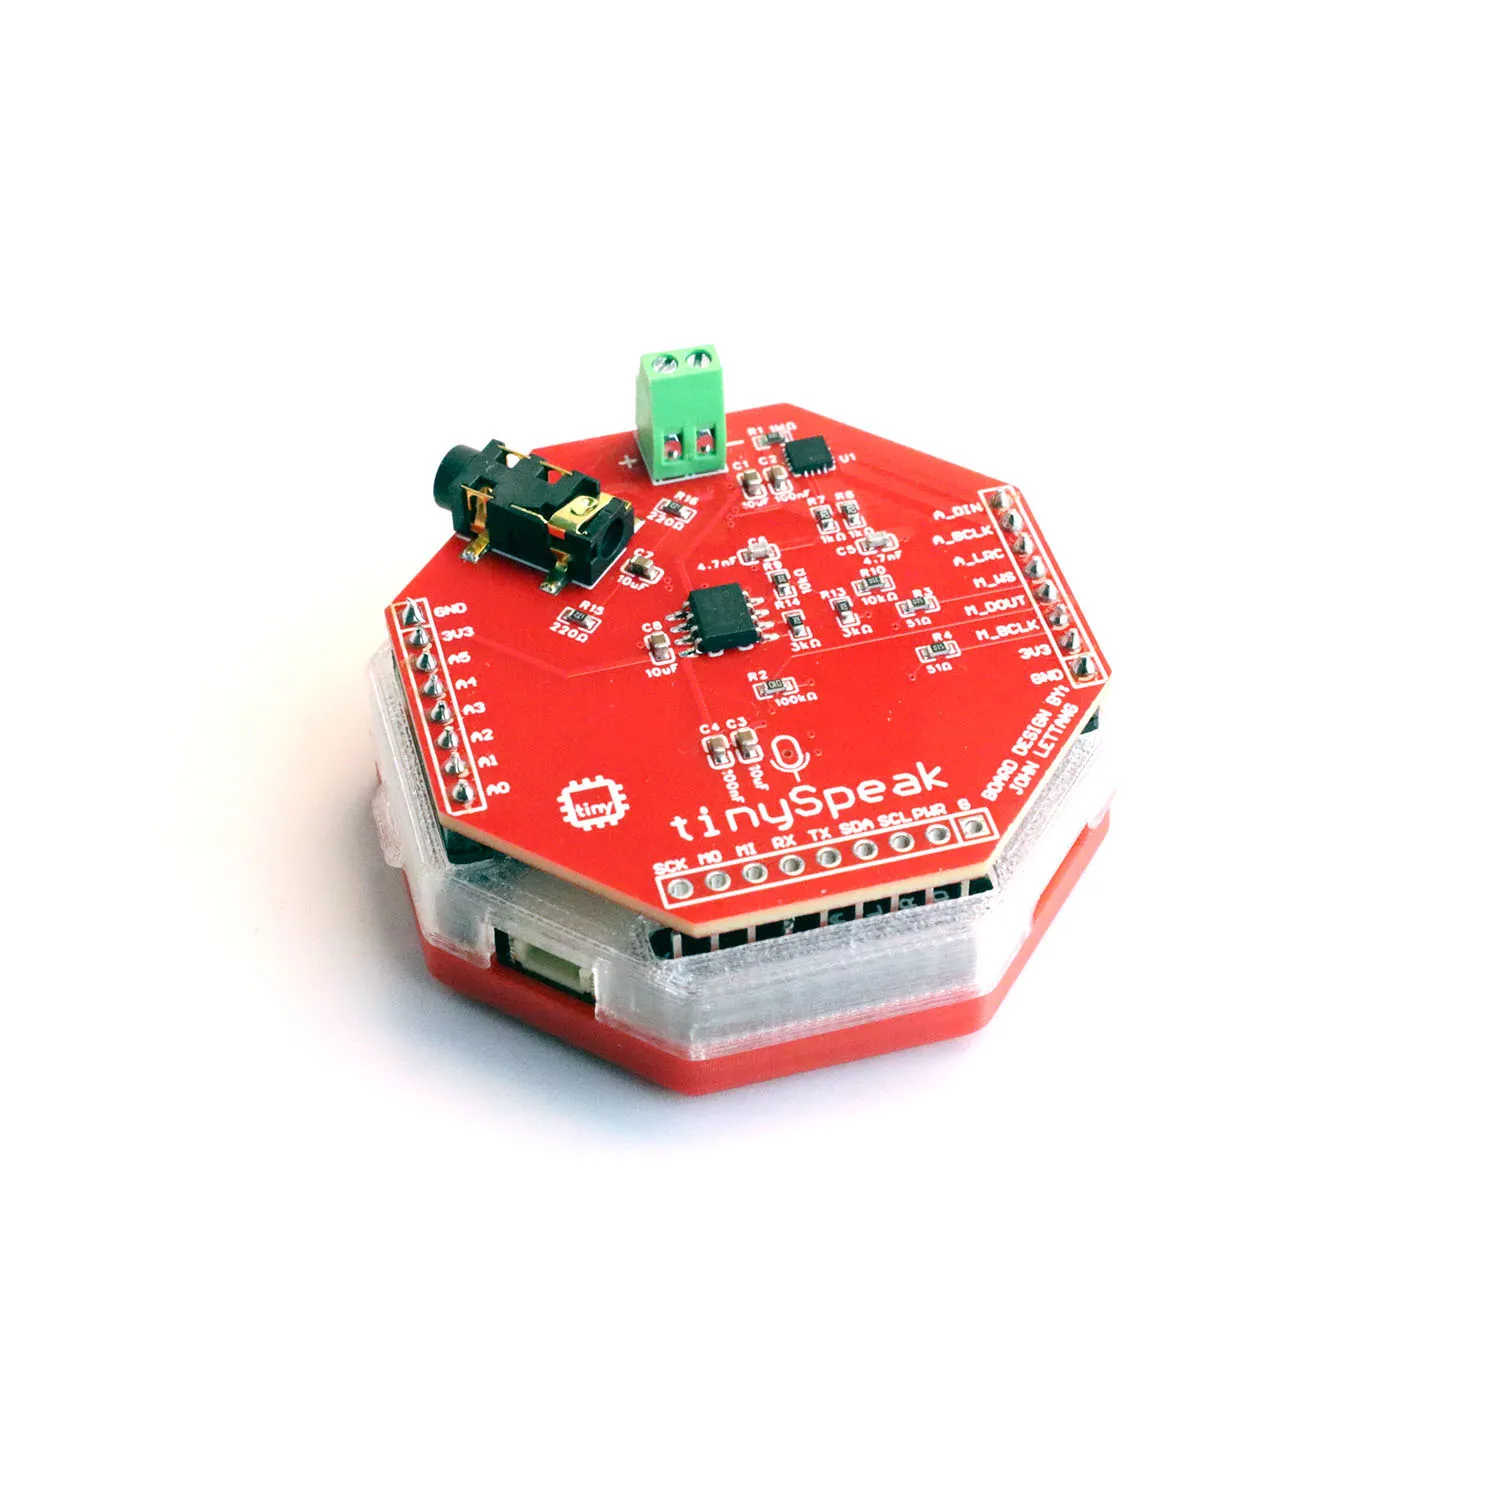
The board carries an I2S digital amplifier driving a built-in speaker, an I2S MEMS microphone for voice capture, a 3.5mm headphone jack with a dedicated analog output stage, and a Micro SD card slot for storing audio files. All of this connects to the tinyCore through stacking headers — there’s nothing to breadboard or solder beyond the initial header assembly.
tinySpeak ships with nine demo programs covering a wide range of audio applications: offline MP3 playback, voice recording, motion-triggered soundboards, a theremin you control by tilting the board, a peer-to-peer walkie-talkie, a browser-based chiptune synthesizer, and three AI voice assistant configurations.
What’s on the Board
Section titled “What’s on the Board”| Component | Part | Description |
|---|---|---|
| I2S Amplifier | MAX98357A | Class-D mono amplifier. Drives the onboard 8Ω speaker directly from a digital I2S signal. |
| MEMS Microphone | SPH0645LM4H-B | I2S digital microphone for voice recording and speech recognition. |
| Headphone Op-Amp | TLV9062 | Dual op-amp that buffers and filters the analog headphone output through the 3.5mm jack. |
| Audio Jack | PJ-327A0-SMT | 3.5mm TRS headphone output. |
| SD Card Slot | Micro SD (SPI) | Required for MP3 playback, voice recording, and all AI demos. Any FAT32-formatted card works. |
The complete bill of materials including all passives and resistor values is available in the tinySpeak GitHub repository.
What You’ll Need
Section titled “What You’ll Need”| Item | Required For |
|---|---|
| tinyCore ESP32-S3 | Everything |
| tinySpeak HAT | Everything |
| USB-C cable | Programming and power |
| Micro SD card (FAT32) | Most demos |
| Soldering iron + solder | Initial header assembly |
| WiFi network (2.4GHz) | AI demos, Web Synth |
| OpenAI API key | AI demos |
| ElevenLabs API key | tinyAIVoice_EL only |
1. Assembling the HAT
Section titled “1. Assembling the HAT”tinySpeak connects to tinyCore through stacking pin headers. If your HAT arrived with loose headers, you’ll need to solder them before first use.
-
Insert the stacking headers into the tinySpeak HAT from the bottom side of the board, so the long pins point downward (these will plug into the tinyCore) and the short pins poke through the top side where you’ll solder them.
There are three headers: two 8-pin male headers and one 9-pin female header. Pay attention to orientation!
-
Before soldering, seat the long pins loosely into the tinyCore (without soldering the tinyCore), then place the tinySpeak on top. This uses the tinyCore as an alignment jig so your headers end up perfectly straight.
-
Solder the short pins on the top side of the tinySpeak board. Tack one pin at each corner first to hold everything in place, then go back and solder the remaining pins.
-
Remove the tinySpeak from the tinyCore, inspect your joints, then re-seat the HAT firmly. The fit should be snug but not require excessive force.
2. Install the Libraries
Section titled “2. Install the Libraries”Different demos require different libraries. Install them through the Arduino IDE Library Manager (Sketch > Include Library > Manage Libraries…) or by searching in the Libraries tab in the left sidebar:
| Library | Used By | Author |
|---|---|---|
| ESP32-audioI2S | MP3 Player, Recorder, Soundboard, AI demos | schreibfaul1 |
| ArduinoJson | AI Text, AI Voice, AI Voice EL | Benoit Blanchon |
| Adafruit LSM6DS | Soundboard, Theremin | Adafruit |
| Adafruit Unified Sensor | Soundboard, Theremin | Adafruit |
| ESP Async WebServer | Web Synth | ESPAsync |
| AsyncTCP | Web Synth | ESPAsync |
The WiFi, SD, SPI, Wire, Preferences, and esp_now libraries are built into the ESP32 Arduino core and don’t require separate installation.
3. Optional: Add the RX Button
Section titled “3. Optional: Add the RX Button”Several demos support an optional tactile pushbutton connected to the tinyCore’s RX pin, used for push-to-talk recording, play/pause, sound triggering, and mute toggling depending on the demo. The tinySpeak PCB does not include this button — you add it yourself if your project needs it.
Wire one leg of the button to the RX pin and the other leg to any GND pin. No external resistor is needed — all demos enable the ESP32’s internal pull-up via pinMode(RX, INPUT_PULLUP).
The RX pin doubles as the ESP32’s UART receive line. In practice this rarely causes conflicts — the button is open (HIGH) by default and only shorts to GND when pressed. Avoid pressing the button while uploading firmware.
Troubleshooting
Section titled “Troubleshooting”“SD card mount failed” — Make sure the card is fully inserted and formatted as FAT32. Cards larger than 32GB may need to be reformatted. Try a different card if the issue persists.
No audio from the speaker — Check that the tinySpeak headers are fully seated on the tinyCore. Most demos default to volume 21 (the Audio library maximum). Verify your audio files are valid .mp3 or .wav files in the root of the SD card.
Microphone not picking up audio — The MEMS microphone has a small port hole on the PCB. Make sure it isn’t blocked or covered. In the tinyRecorder demo, try recording a loud clap close to the board, then play it back to confirm the mic is functional.
WiFi connection fails — Double-check your SSID and password by running the config wizard again (c in Serial Monitor). The ESP32 supports 2.4GHz networks only — it cannot connect to 5GHz WiFi.
“HTTP Error 401” from OpenAI — Your API key is invalid or has expired. Generate a new one and re-enter it with c in the Serial Monitor.
Audio cuts out mid-sentence in AI demos — This is a RAM issue the demos already work around by streaming TTS audio to SD before playback. If you’re modifying the code, avoid buffering large HTTP response bodies in a String.